A Step into the Twilight Zone
For my first project post of 2017, I think I'll about something a little off-the-wall. So, without further ado, it's time for me to talk about something I've found fascinating since 2012 when I started dabbling in psychology, hypnosis and mentalism: Lucid dreaming. A lucid dream is like a normal dream, but with the key difference being that the dreamer is aware that they are dreaming. Once the dreamer has realised this fact, it is said that they can then exact a level of control over the dream, which - according to some people - has some fantastic applications in getting creative inspiration to problems, helping people get over nightmares, and encouraging you to actually sleep regular hours.
Naturally, this was something I just had to try out for myself! I mean, who doesn't want what is basically their own Holodeck? I learned that apparently the easiest way to induce a lucid dream was to perform something called a reality check. This basically involves performing a test that has a different result depending on whether you perform it in a dream or in reality. These are things such as holding your nose and attempting to breathe through it, putting your finger through your hand (these are both said to work in a dream), or count your fingers (as in a dream your short-term memory is impaired, meaning that you will incorrectly count the 5 fingers). By performing reality checks regularly and combining them with a dream journal (namely, a book in which you write down your dreams), you should perform a reality check in a dream, realise you are dreaming, have a lucid dream and finally wake up and remember it.
Sadly, my dreams (de-dum tiss) of gaining lucidity came to little avail, and for the most part I simply ended up with a notebook full of strange stories. After some time thinking on it, I've come to the conclusion that it has something to do with my historically bad short-term memory. As working memory is impaired in a dream-state anyway, I figure I have absolutely no hope of remembering that I've just discovered I'm dreaming, let alone to reality check in the first place.
Last year though, I had an idea. If I couldn't remember to reality check myself, then could I build something that would remember for me? Inspired by vague memories of Sensebridge's North Paw kit I decided to build a simple anklet with a single mobile phone vibration motor in it that would trigger every half an hour. The idea was that I could make it habit to reality check every time I felt the vibration in my ankle. Once that habit was solidly formed, I could wear the anklet to bed and hopefully I'll have the same response while dreaming; causing me to reality check while I dream.
Materials
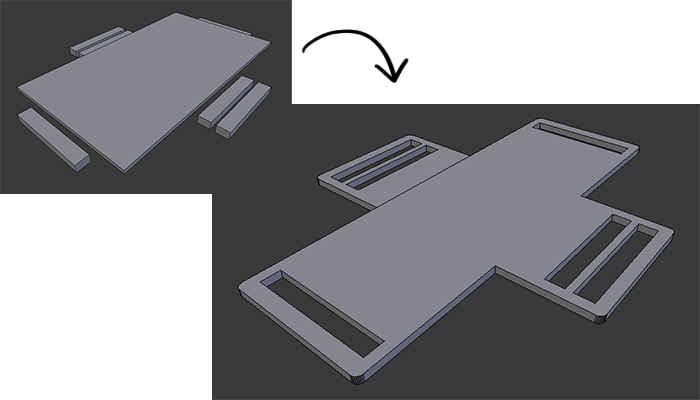
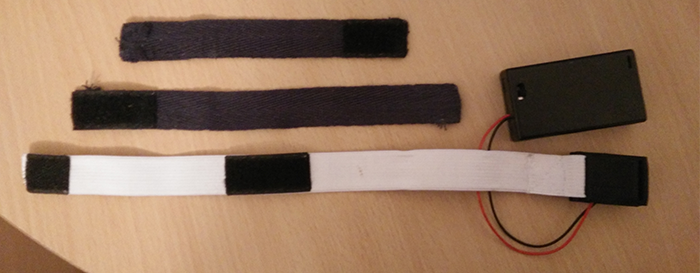
In order to build the anklet, I revived my old 3D printer, a modified RepRapPro Mono Mendel that I built back in 2014 just before I went to uni, that hasn't seen much action in my time studying. Following the general pattern of a watch, I designed 2 printable parts that could be mounted on a length of 2cm wide elastic, which I would then attach velcro to in order to form a well-fitting adjustable strap.
I had decided that the circuit was going to be ATTiny85 based, which meant that it wouldn't be too fiddly to program, and small enough to fit on my leg without sticking out. Plus, I'd wanted to have a reason to use one for a while. With this in mind, I first measured and modelled the shapes of the motor, chip and the gaps I wanted to leave for the elastic to thread through, then I designed around these objects (again in Blender):
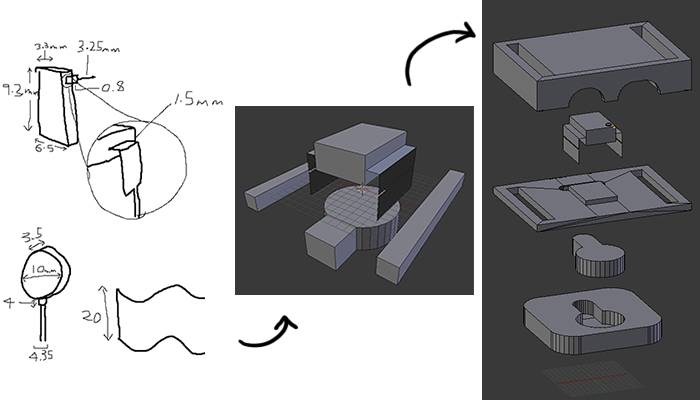
I took a similar approach designing the battery holder's support, in this case a switched 3xAAA holder. Though with this, I opted for a design that allowed me to loop two velcro'd lengths of material through and around the holder, allowing me easy access to it for battery replacement. Though, the next version will most definitely have a smaller battery pack.
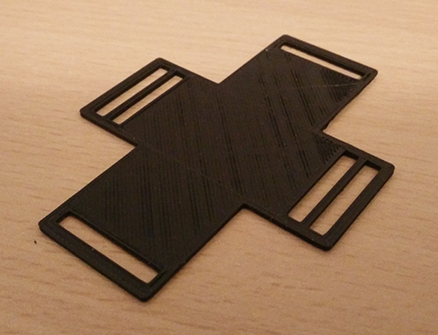
The printer performed admirably, save for a bit of warping on the vibration pad cover (on the right):

Electronics
As I said, I had been looking forward to using the ATTiny85, so designed the circuit around that (Fritzing is a lot neater than my original diagram in MS Paint):
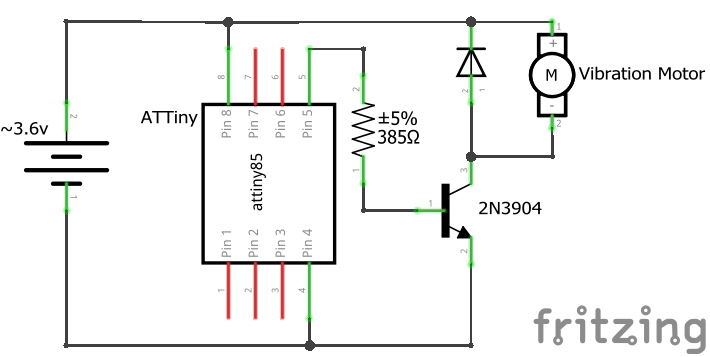
It consists of the battery pack (3.6v at 3x1.2v AAA batteries) and a vibration motor hooked up to the ATTiny85 via a 2N3904 NPN transistor. There's a diode across the pins of the motor to stop back-EMF - a phenomenon that occurs when a motor is turned off, where the still-moving motor axis continues to interact with the magnetic field of the motor causing the generation of an electrical voltage opposed to the rest of the circuit. The diode stops that voltage from getting any further away from the motor; it is simply converted to heat (miniscule amounts at this scale) through resistance of the small motor-diode circuit, without affecting the rest of the circuit.
I have connected the battery through the transistor's collector to aviod the voltage drop that occurs when connecting through the emitter instead. The resistor between the ATTiny and the transistor's base acts as a current limiter protecting the ATTiny by stopping high current draw (the ATTiny's max current per I/O pin, according to page 161 of the specs is 40mA).
You may note that I have opted not to place a capacitor across the batteries in order to steady the supply. Admittedly this is in part because I had forgotten to factor this into my designs, but I also didn't have one to hand and so decided that as it wasn't exactly a critical element, I'd forgo it. This has caused no problems so far.
In the interest of saving space and because I do not have access to PCB fabrication facilities, I soldered the whole thing together component-wise and glued it to the case's back panel, then heavily applied hot glue to keep the circuit from shorting out:
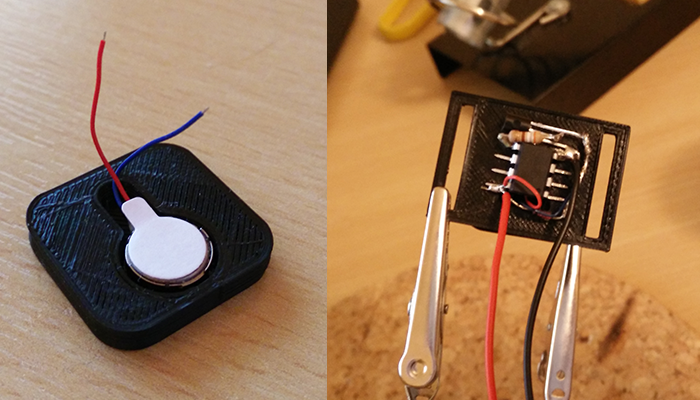
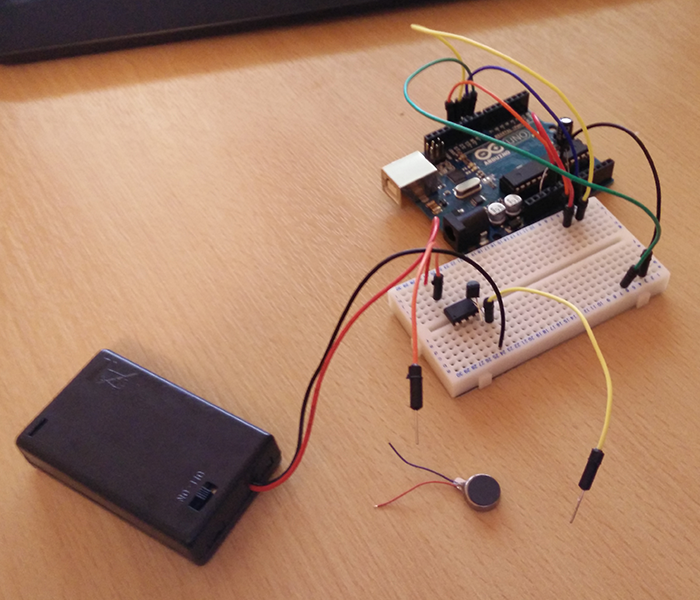
As the ATTiny85 can be programmed using an Arduino Uno and a capacitor (High-low tech have a nice detailed tutorial on the subject here), it was quite a breeze to set up and program:
const int LED = 0;
const unsigned int TWENTY_SECONDS = 20000; // 20 seconds in milliseconds
const unsigned int REGULAR_WAIT = 90; // The amount of time between double buzzes (half an hour)
const unsigned int SLEEP_WAIT = 270; // The amount of time it should be off for before it starts so that people can get to sleep
bool firstLoop = true;

void setup() {
  pinMode(LED, OUTPUT);
}

void loop() {
  digitalWrite(LED, HIGH);
  delay(1000);
  digitalWrite(LED, LOW);
  delay(1000);
  digitalWrite(LED, HIGH);
  delay(1000);
  digitalWrite(LED, LOW);
  if(firstLoop == true)
  {
    // Hacky way of sleeping for a long time. But I am tired and want to sleep for a long time instead, so this will do.
    for(int i = 0; i<SLEEP_WAIT; i++)
    {
      delay(TWENTY_SECONDS);
    }
    firstLoop = false;
  }else{
    // Hacky way of sleeping for a long time. But I am tired and want to sleep for a long time instead, so this will do.
    for(int i = 0; i<REGULAR_WAIT; i++)
    {
      delay(TWENTY_SECONDS);
    }
  }
}
I've added an additional bit of functionality, namely that the unit sleeps for one and a half hours before it starts pulsing every half hour, that is so that when I do come to go to sleep with it on, I'll have one and a half hours uninterrupted time to get to sleep before it starts up.
As for the way I've implemented a long sleep there, I stand by my words - half an hour is too long to ask the chip to sleep for, and just calling a 20 second sleep 90 times works just as well for this application (it takes quite a while to debug or test code that takes a long time to do anything). Saying that, if anybody wants to do it the right way, feel free to put in a pull request on the GitHub page - though I'll only accept it if you can prove that it actually works, I don't really want to sit around for half an hour to see if it does or not. I have done enough of that.
Assembly
The entire thing came together rather well. The majority of the assembly consisted of sewing velcro to the various straps on it (Note self: Velcro is thick and hurts to sew through. Avoid at all costs). This did make for a fairly well-finished piece:
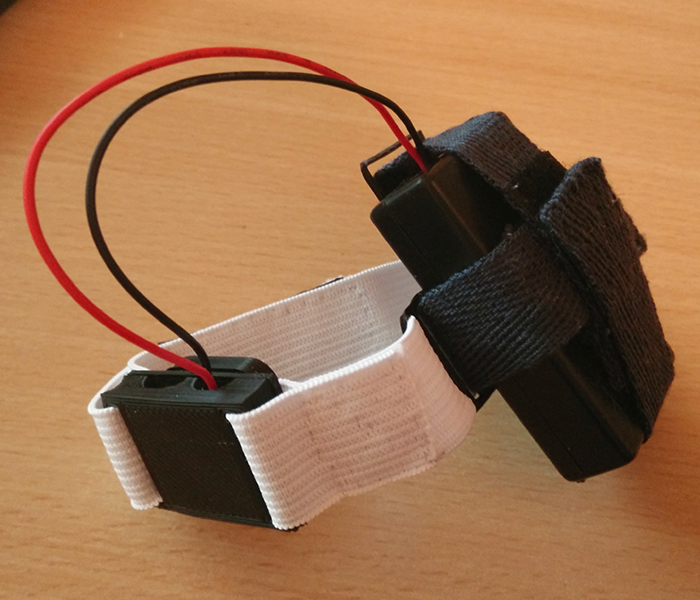
Initially, I had problems with the battery holder, as it printed a bit funny the first time around and was a little on the thin side. However, after making it slightly thicker and reprinting, it is certainly standing the general strain I put on it as I run to and from places.
Closing Thoughts
Whether or not this device will actually work remains to be seen. I have been wearing it during the day for about a week and a half now, and plan on wearing it for 3 weeks for the training phase, and then I'll spend a week wearing it at night and post back here with my results. I have no idea whether or not it'll work, but either way it's been a fun build, plus it's given me a chance to tune up my old 3D printer.
I think I may have to change the battery out for something slightly smaller at some point, as it is I believe it shall be fairly uncomfortable to sleep with around my ankle. On the plus side, it's lasted this long and I've only charged the three 350mAh AAA batteries once for 20 minutes so far.
The entire project is on GitHub, if you would like to have a go at making your own (do leave a comment telling me how it goes if you do! A sample size of one is not very statistically significant!) and I have also had a few requests from friends who are interested in trying one out for themselves, so I might well open an Etsy page or something for them.
Check back in a few weeks to see how it's gone and if it's worked! Alternatively, you can follow me on Twitter, I've got to admit I'm not a heavy tweeter, but I do post updates on projects I'm working on and announcements whenever a new blog post is available. Thanks again to Reuben for proofreading this post!